> For the complete documentation index, see [llms.txt](https://docs.skyone.cloud/llms.txt). Markdown versions of documentation pages are available by appending `.md` to page URLs; this page is available as [Markdown](https://docs.skyone.cloud/english/skyone-studio/how-to/how-to-set-up-whatsapp-in-skyone-studio.md).
# How to set up WhatsApp in Skyone Studio
To configure WhatsApp Business, you will need to work simultaneously in two platforms: [**Skyone Studio**](https://studio.skyone.cloud/) and [**Meta for Developers**](https://developers.facebook.com/appshttps://developers.facebook.com/apps).
Steps:
1. [**\[ Step 01 \]** Create an app in Meta for Developers](#step-1-create-an-app-in-meta-for-developers)
2. [**\[ Step 02 \]** Generate the Access Token](#step-2-generate-the-access-token)
3. [**\[ Step 03 \]** Use the WhatsApp Data in Skyone Studio](#step-3-use-the-whatsapp-data-in-skyone-studio)
4. [**\[ Step 04 \]** Finalize the configuration in Meta for Developers](#step-4-finalize-the-configuration-in-meta-for-developers)
***
#### Step 1: Create an app in Meta for Developers
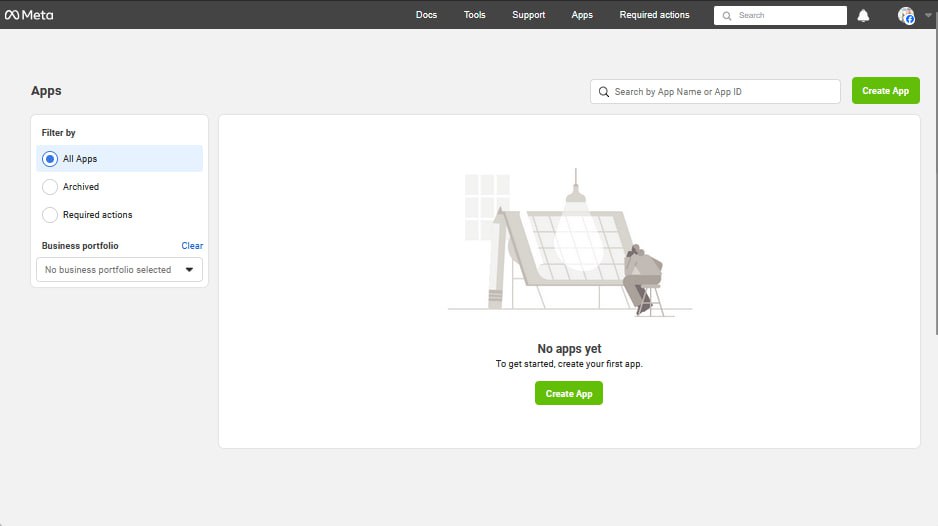
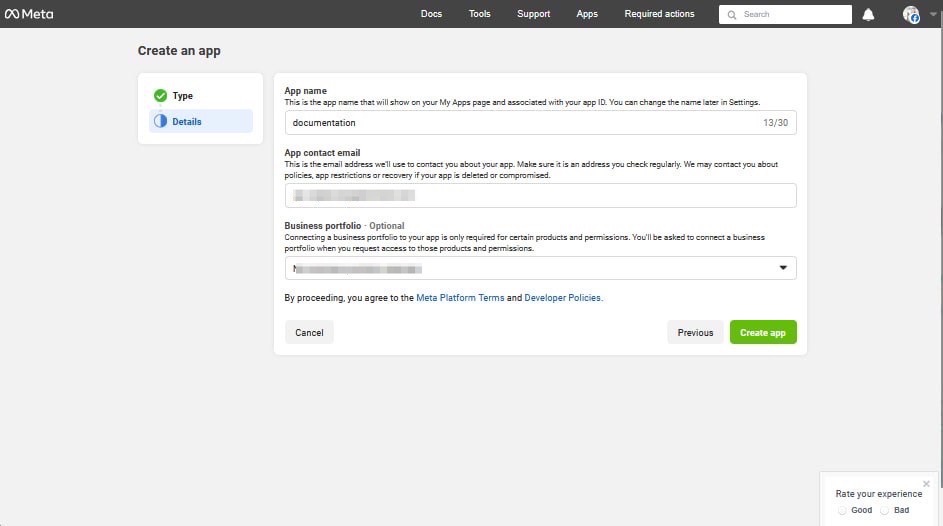
1. Go to [**Meta for Developers**](https://studio.skyone.cloud/login) and click "**Create App"**.
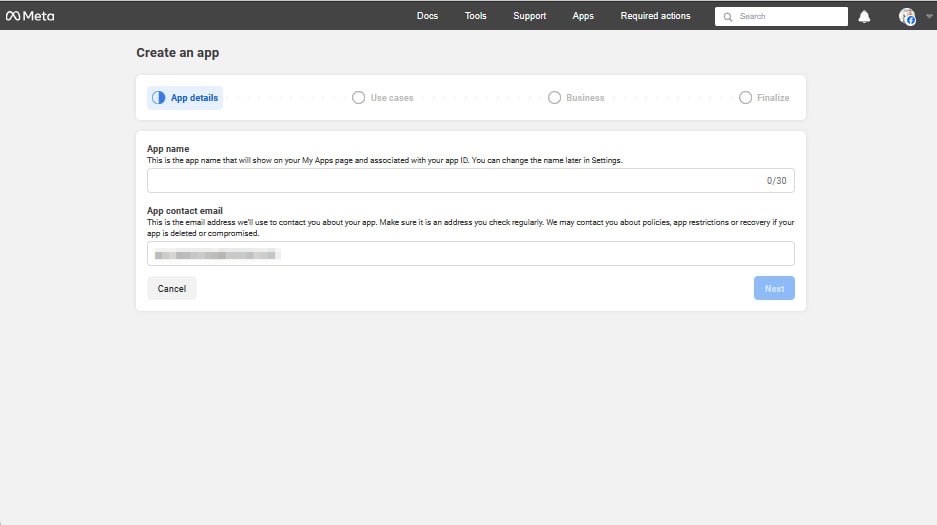
2. In the **App Name** field, enter a name for your application and click **Next".**
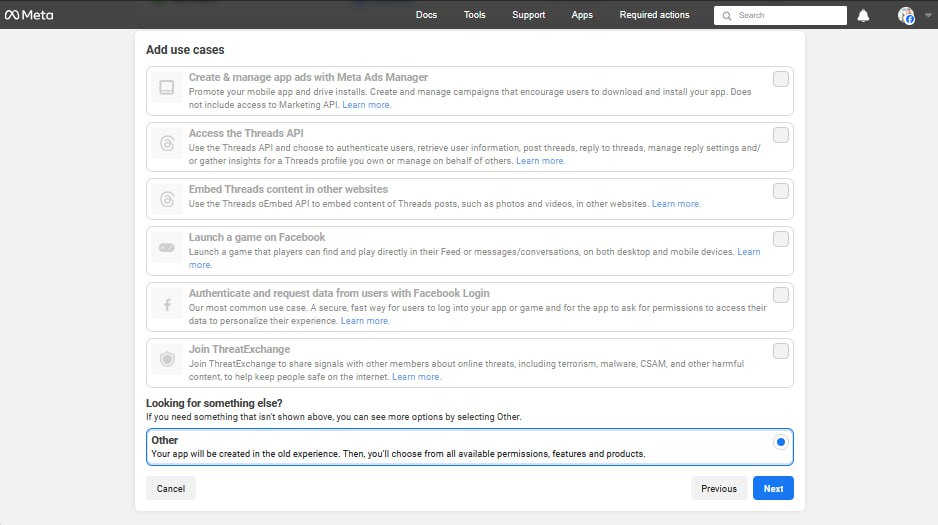
3. Under **Use Case**, select **Other** and click "**Next"**.
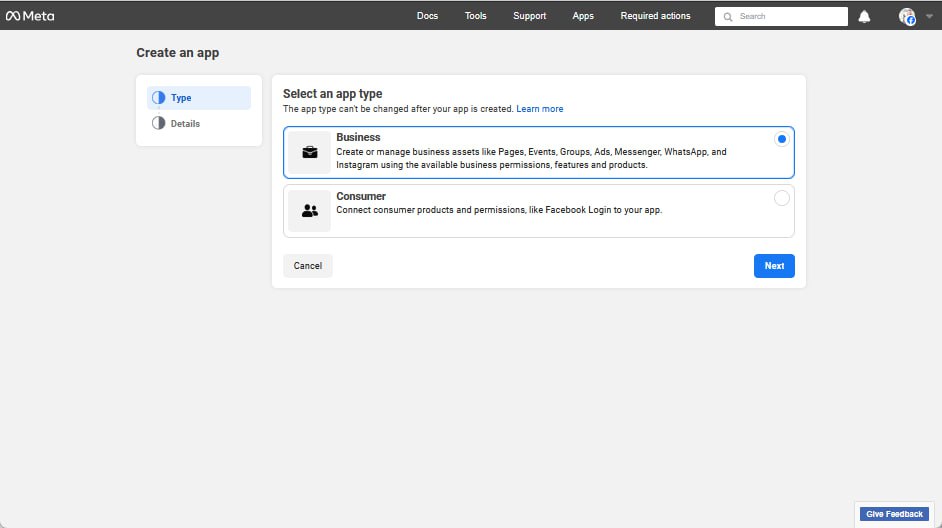
4. In the **Business Type** step, select **Business** and click "**Next"**.
5. Select the desired business portfolio and click "**Create App"**.
#### Step 2: Generate the Access Token
There are two configuration modes:
* **Development Mode**: Ideal for validation and testing.
* **Live Mode**: For production use.
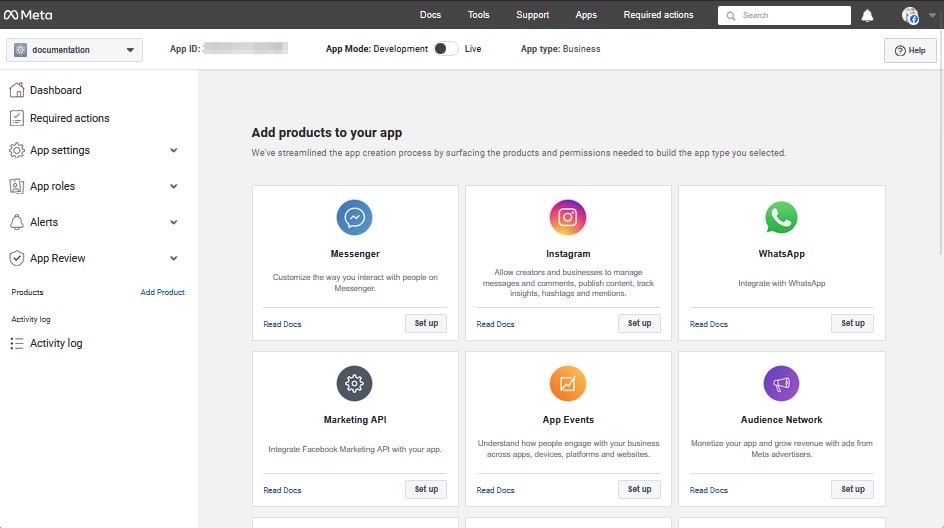
1. In the left-hand menu, go to **WhatsApp** and click "**Set up"**.
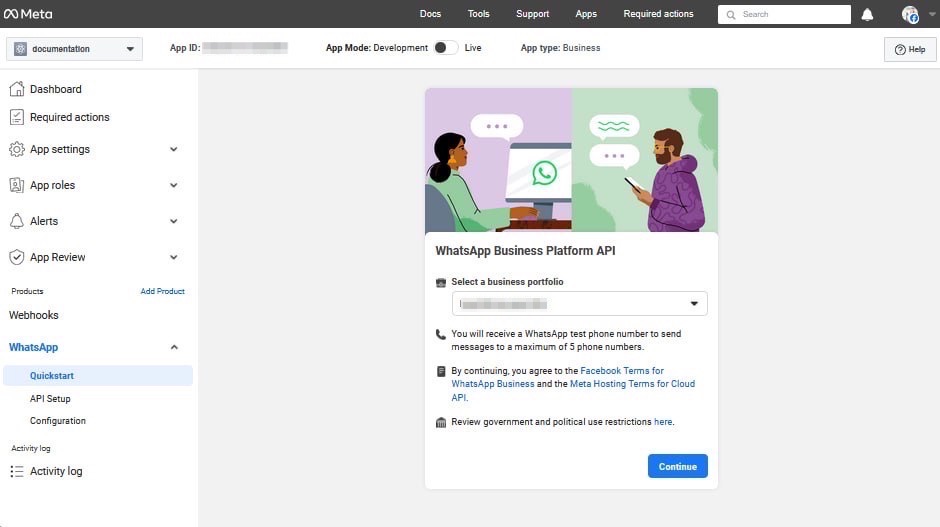
2. On the configuration screen, click "**API Setup"**.
3. Click "**Continue"**.
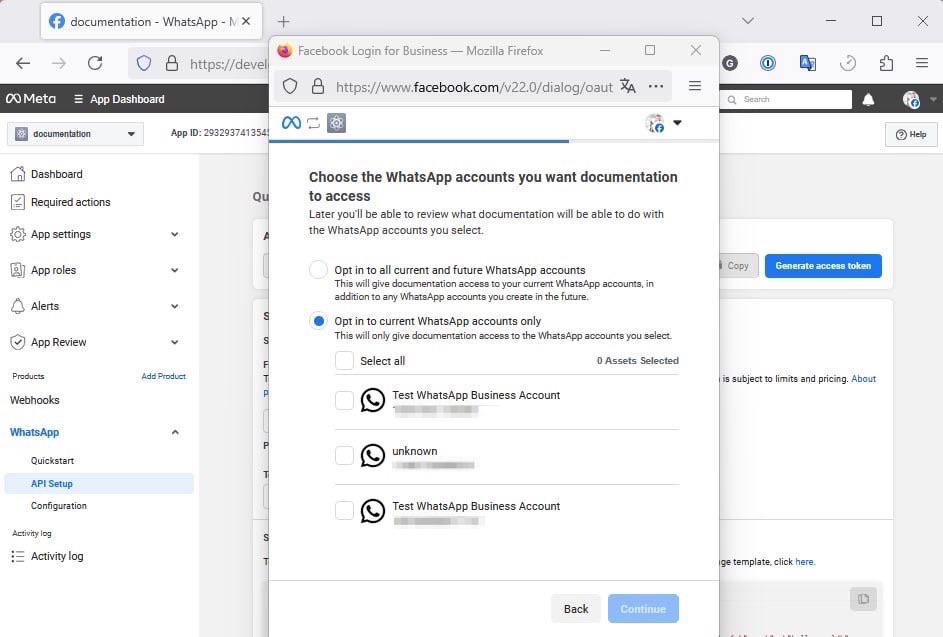
4. Select "**Generate access token"**.
* Choose the WhatsApp account provided by Meta for testing.
* Click "**Continue"**, then click "**Save"**
{% hint style="info" %}
Important: The token generated in development mode is valid for only 1 hour.
{% endhint %}
5. After creating the token, click "**Got it** to complete this step.
#### Step 3: Use the WhatsApp Data in Skyone Studio
1. Access **Skyone Studio**.
2. In the **Integrations** menu, click "**Publish"**, located on the right side of the screen.
3. Select "**WhatsApp"**.
4. Fill in the fields with the information obtained from Meta for Developers:
* **Agent Flow**: Select a flow previously created in **Skyone Studio**.
* **Name**: Enter a name for this publication.
* **Number ID**: You can find this in Step 2, in the URL shown at the beginning of the code.\
Example: In the URL , the ID is **123456789**.
* **Number**: Use the configured number (for example, the test number).
* **Token**: Enter the generated token.
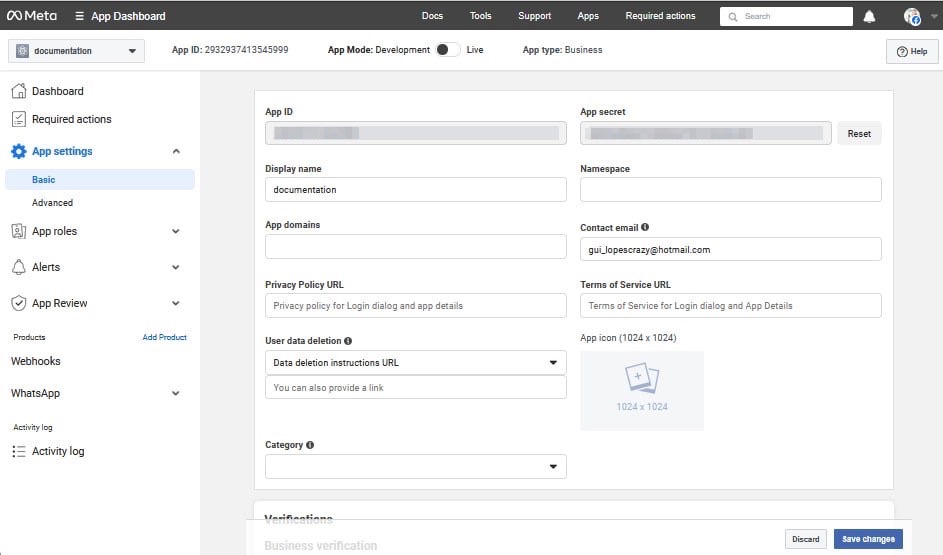
* **API Secret**:
* In the app menu, go to "**Settings"**.
* Select "**Basic**.
* Click "**Show** next to **App Secret** to reveal the value.
After filling in all the fields, click "**Save publication**". The platform will display the details of the established connection.
#### Step 4: Finalize the configuration in Meta for Developers
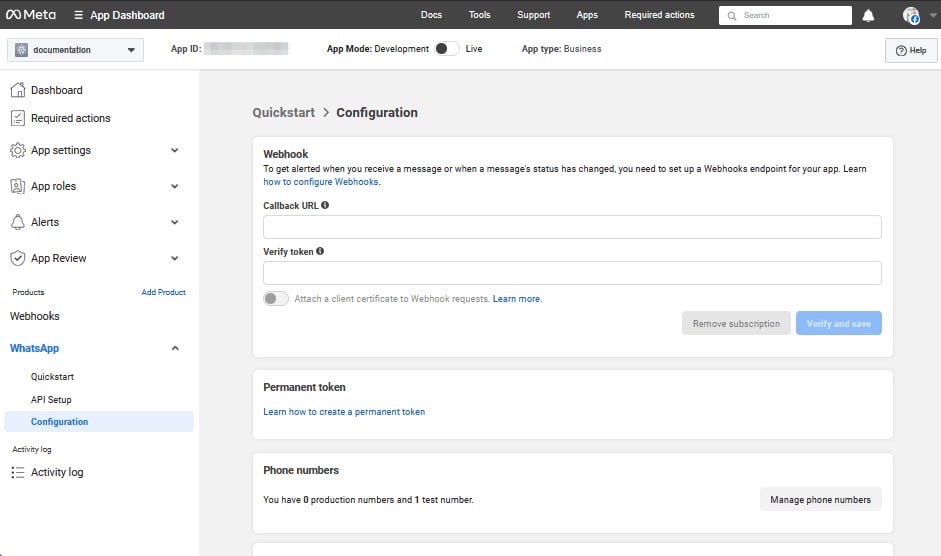
1. In the Meta Developers menu, select **WhatsApp** and click "**Configuration"**.
2. Fill in the following fields with the data from **Skyone Studio**:
* **Callback URL**: Paste the value from the Webhook field.
* **Verification Token**: Paste the value from the Verification Token field.
1. Under **Webhook fields**, ensure the **Messages** option is marked as "**Subscribed"**.
2. Click "**Verify and Save**.
That’s it! Your WhatsApp Business setup in **Skyone Studio** is now complete and ready to use.
---
# Agent Instructions
This documentation is published with GitBook. GitBook is the documentation platform designed so that both humans and AI agents can read, navigate, and reason over technical content effectively. Learn more at gitbook.com.
## Querying This Documentation
If you need additional information that is not directly available in this page, you can query the documentation dynamically by asking a question.
Perform an HTTP GET request on the current page URL with the `ask` query parameter, and the optional `goal` query parameter:
```
GET https://docs.skyone.cloud/english/skyone-studio/how-to/how-to-set-up-whatsapp-in-skyone-studio.md?ask=&goal=
```
`ask` is the immediate question: it should be specific, self-contained, and written in natural language.
`goal` is optional and describes the broader end goal you are ultimately trying to accomplish on behalf of the user. GitBook uses it to tailor the answer towards what is most useful for that goal.
The response will contain a direct answer to the question and relevant excerpts and sources from the documentation.
Use this mechanism when the answer is not explicitly present in the current page, you need clarification or additional context, or you want to retrieve related documentation sections.