# Agent

* [Overview](#overview)&#x20;
* [Minimum Requirements ](#minimum-requirements)
* [Installation](#installation)&#x20;
* [Settings](#installation-1)&#x20;
* [Logs](#logs)&#x20;
  * [Windows](#logs)
  * [Linux e Docker ](#logs)
  * [Agent Registration: Possible Errors](#logs)

### Overview <a href="#overview" id="overview"></a>

Most ERPs do not offer open and comprehensive APIs that allow these systems to integrate seamlessly with other applications and solutions. As an alternative, many ERP vendors allow or tolerate integration at the data level. In this type of integration, an external agent—typically a service installed on the same machine as the database—has access to the database and can execute queries on system tables or views.

Based on this concept, we created the **Agent**, a secure extension of Skyone Studio that can be installed in on-premises environments, using secure communication mechanisms. When in use, the Agent acts as a passive component, executing only requests sent by external software or automated within Skyone Studio.

General characteristics of the "**Agent**":

* Connect locally to a database or REST resource
* Support for multiple database types
* Restful support
* Processing requests coming from any **Skyone Studio** Integration, with different users and permissions
* Connecting to **Skyone Studio** and keeping a communication channel open to receive calls immediately
* Receiving "RPC like" calls from **Skyone Studio**, which are mapped into actions in the database or into REST calls
* Responding asynchronously to **Skyone Studio** calls
* Automatically restarting itself if the computer on which it is installed is restarted, without the need to re-enter authentication data.

### Minimum Requirements <a href="#minimum-requirements" id="minimum-requirements"></a>

The minimum requirements for the Agent:

**Disk**: 1GB free

**Memory**: 512MB

**CPU**: 1 core 1.5GHz

### Installation <a href="#installation" id="installation"></a>

To download and install "**Agent**" :&#x20;

1. Click on "**Terminals**" and then click on "**Download Agent**".&#x20;
2. Note that there are three download options: Windows, Linux and Docker. Choose the most suitable option and click on "**Download**".&#x20;
3. Follow the instructions according to your operating system:

{% tabs %}
{% tab title="Windows" %}
For the Windows operating system:&#x20;

1. On the screen that appears when you run the application, click on "**Next**". Wait for the installation to finish.&#x20;
2. Once the installation has been successful, click on the "**Launch application**" option and then on the "**Finish**" button to complete the installation.&#x20;
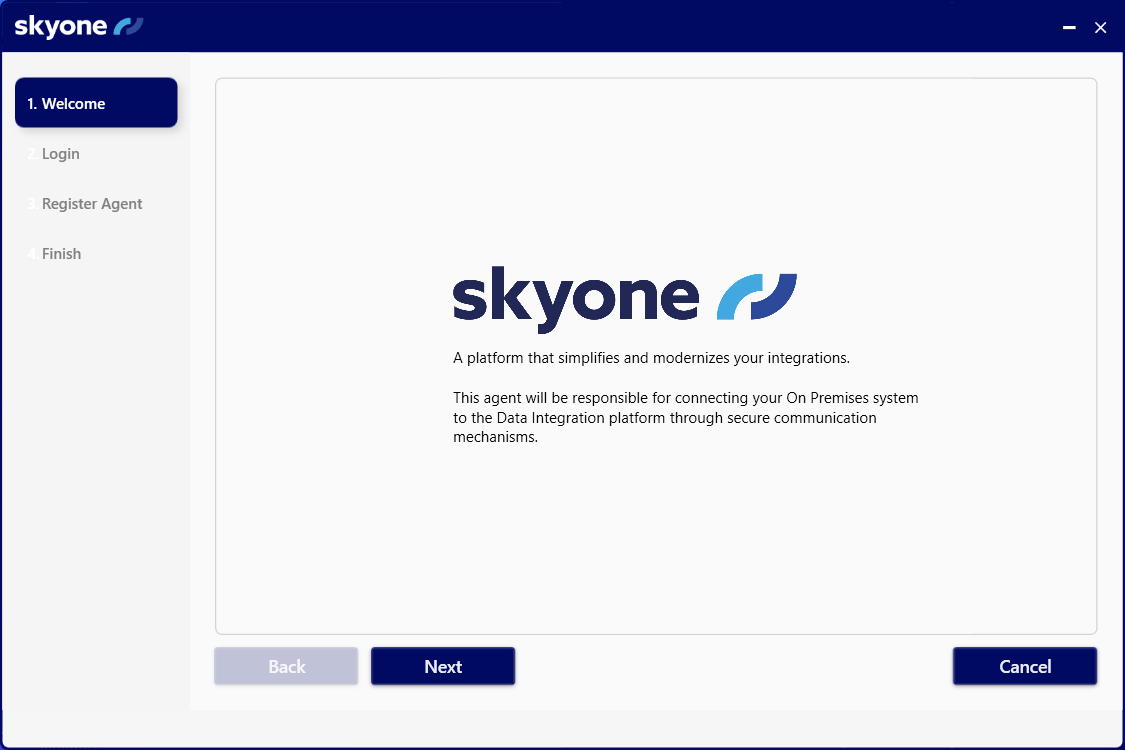
3. The Agent will start up and you will be presented with some steps for configuring it. Click on "**Next**".

   <figure><img src="/files/ejFJ2xp8NhHxZrcX3avG" alt=""><figcaption></figcaption></figure>
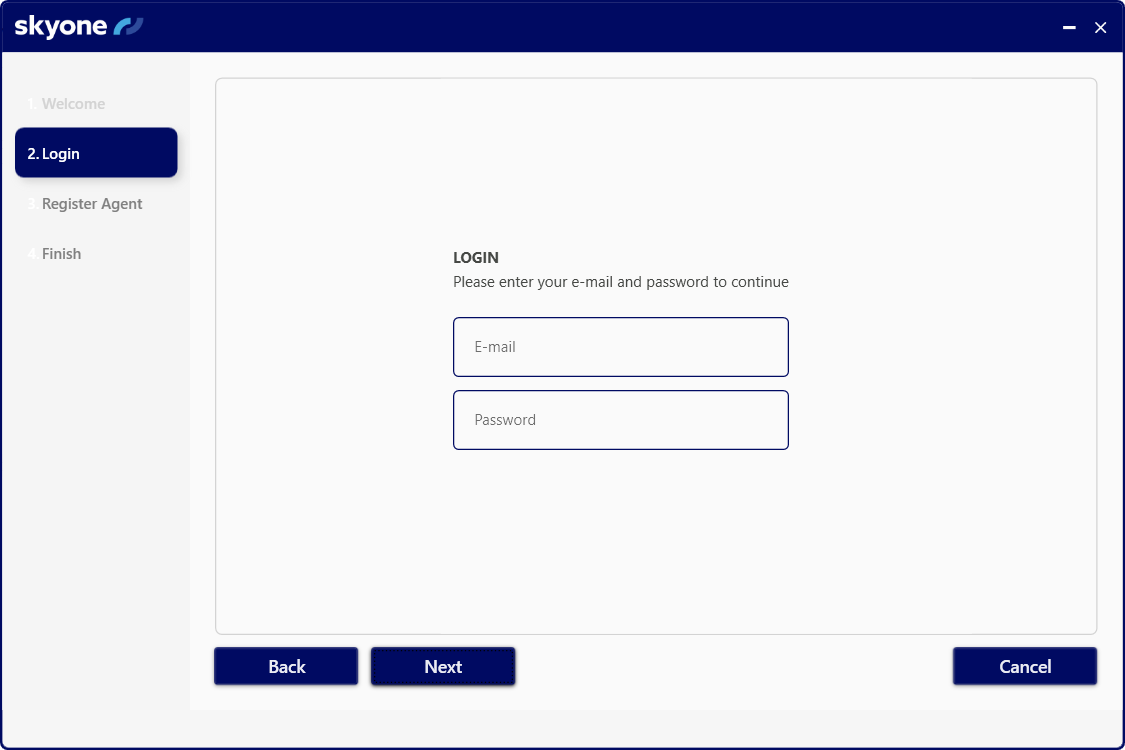
4. Enter your Skyone Studio access credentials and click "**Next**".

   <figure><img src="/files/QBlSwrIv5F8S6aU84uKM" alt=""><figcaption></figcaption></figure>
5. Select the organization (workspace) you want to use the "Agent" for and enter a name and location for it.

   <figure><img src="/files/VmGoGamSTlMHmuXUfppJ" alt=""><figcaption></figcaption></figure>

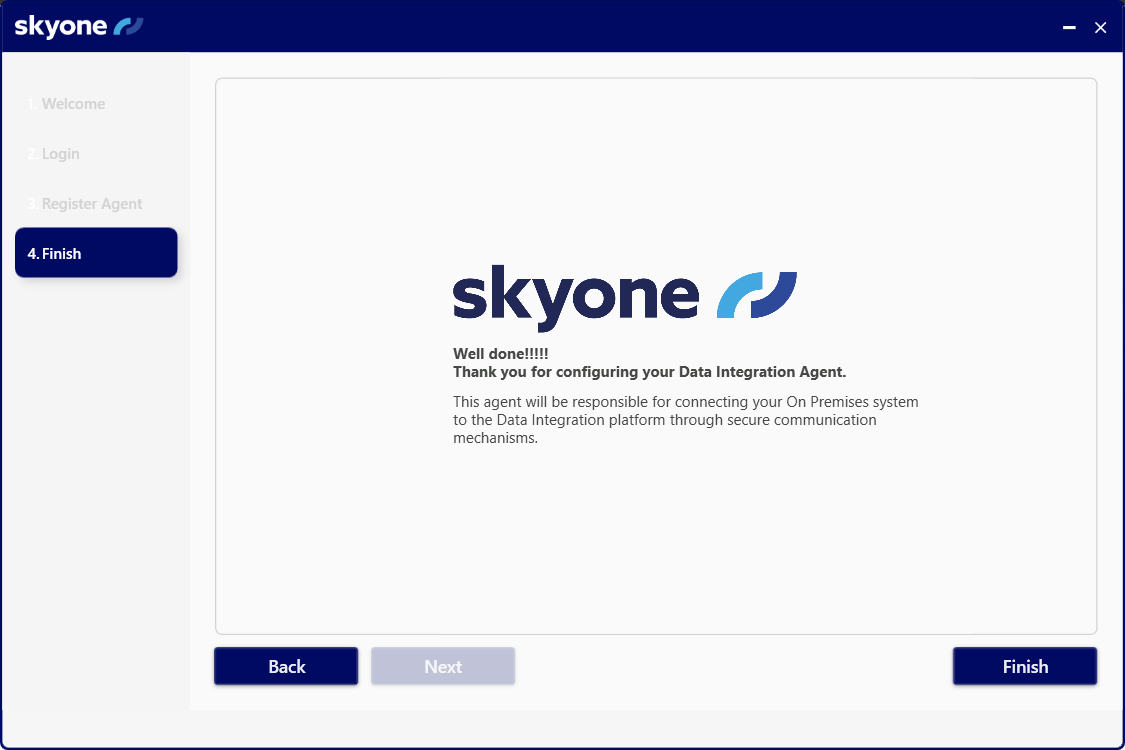
Done! Your "**Agent**" is configured and ready to be used in Windows environments. Click on "**Finish**" to end the configuration procedure.
{% endtab %}

{% tab title="Linux" %}
To install the Agent on Linux, follow these steps:

1. **Access Administrator Mode**

You need to enter root mode. Use the following command:

```
sudo su
```

2. **Download the Installer**

Download the **Agent** `.deb` file using the `curl` command:

```
curl https://skyone-integrasky-inventory-hml.s3.amazonaws.com/agent/linux/IntegraSkyAgentSetup_v2.28.1.deb --output IntegraSkyAgentSetup_v<version>.deb
```

3. **Install the Agent**

Once the file is downloaded, run the installation of the `.deb` package:&#x20;

```
apt install -f ./IntegraSkyAgentSetup_v<version>
```

4. **Open the installation folder**

Navigate to the folder where the Agent was installed:

```
cd /usr/local/bin/skyone-solutions/integrasky-agent  
```

5. **Run the Agent**

Start the **Agent** using the following command:

```
./IntegraSky
```

6. **Register the Agent**

Register the terminal with the provided credentials:

```
register -u <user@email> -p <password>
```

{% hint style="info" %}
In the Skyone Studio product, the command above is already available with your email pre-filled.
{% endhint %}

Your workspaces will be listed and you will be asked to select which one you want to connect:

<figure><img src="https://skyone.atlassian.net/wiki/download/attachments/2893053953/linuxCommand.png?version=1&#x26;modificationDate=1702305657606&#x26;cacheVersion=1&#x26;api=v2&#x26;borderSize=&#x26;borderColor=&#x26;targetURL=" alt=""><figcaption><p>Example</p></figcaption></figure>
{% endtab %}

{% tab title="Docker" %}
For Docker, first make sure you have Docker installed on your machine. If not, follow the procedure [here](https://docs.docker.com/engine/install/).

After installing Docker on your machine, you need to download the image:

{% hint style="info" %}
`docker pull integrasky/agent:latest`
{% endhint %}

Once the download is complete, you can run the "**Agent**" using the command below.

```
docker run -e "INTEGRA_ENV_USER=<email>" -e "INTEGRA_ENV_PASSWORD=<password>" -e "INTEGRA_ENV_ORGANIZATION_ID=<code?" -e "INTEGRA_ENV_AGENT_NAME=<agent name>" -e "INTEGRA_ENV_AGENT_LOCATION=<agent location>" integrasky/agent:latest -v /caminho/para/dados:/data/integraNa plataforma Skyone, você tem acesso ao comando acima já com o seu email e seu Organization ID inclusos.
```

{% hint style="info" %}
No produto Skyone Studio, você tem acesso ao comando acima já com o seu email e seu Organization ID inclusos.
{% endhint %}

<figure><img src="/files/OVfRXb52XHZXl64lJnHm" alt=""><figcaption></figcaption></figure>

Check all the configuration options below in the Docker tab under [Settings](#installation-1).
{% endtab %}
{% endtabs %}

{% hint style="info" %}
Find out more about the [versions supported by the Agent](/english/skyone-studio/terminals-and-agent/agent/versions-supported-by-agent.md).
{% endhint %}

{% hint style="info" %}
You will need to reinstall the "**Agent**" if you need to move it to another workstation, add it to **Skyone Studio** again, or if you need to make hardware modifications.
{% endhint %}

### Settings <a href="#installation" id="installation"></a>

Follow the instructions to configure your "**Agent"** according to your operating system:

{% tabs %}
{% tab title="Windows" %}
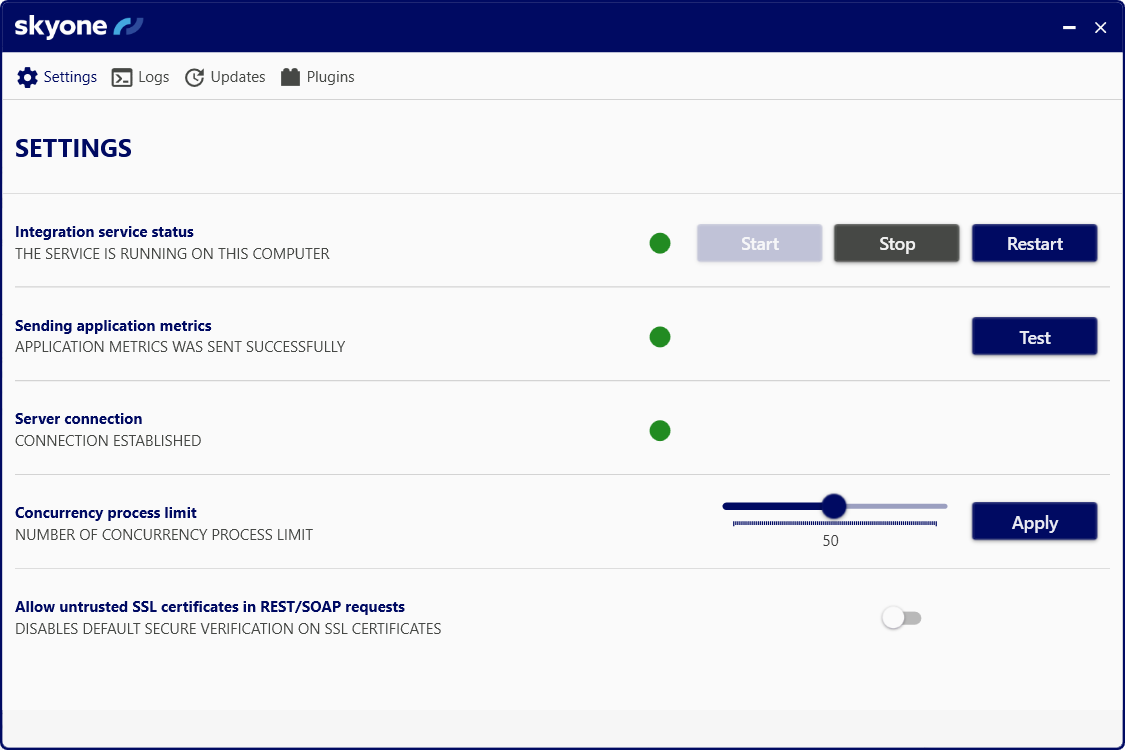
When you click on the "**Agent**" in Windows, **Settings** is the first tab to appear in the window, as shown in the image below:

<figure><img src="/files/JNV9YxvEH1qa7RgkINVc" alt=""><figcaption></figcaption></figure>

These include:

* Integration service status: it is possible to **Start**, **Stop**, and **Restart** the integration service. When the service is stopped, operations in Skyone Studio involving accounts connected to a registered **Terminal** cannot be executed.
* **Internet connection test:** identifies whether the "**Agent**" is connected to the internet.
* **Server connection:** identifies whether the "**Agent**" is connected to plataform's servers.
* **Concurrency process limit:** allows the capacity for parallel processing to be set between the range of 1 and 100. The default value is 50. The default value is 50. After making any changes, click "**Apply".** After that, confirm the restart of the "**Agent**" services by clicking "**Yes"**, so that the new settings are activated.
* **Allow untrusted SSL certificates in REST/SOAP requests:** by activating this option, the "**Agent**" will allow communication between systems, even if the SSL certificate is not considered secure by conventional standards. By sliding the button, a window will appear for you to confirm the restart of the "**Agent**" services and the new settings will be activated.

When either of the two services (integration or server) is working, the colored icon will be green. If there is a problem with the connection, it will turn red. If the "**Agent**" is waiting to connect to one of the services, the icon will turn gray.

Once the "**Agent**" has been registered, it will soon appear in the "**Terminals"** tab.

{% hint style="info" %}
If there is a problem with any of the services (integration or server), the status of the registered "**Agent**" will also appear in gray or red in the "**Status"** column.
{% endhint %}

{% hint style="warning" %}
It is possible to close the Agent window without compromising the use of **Skyone Data**. However, the computer must be **powered on** for communication to take place.
{% endhint %}
{% endtab %}

{% tab title="Linux" %}
To configure the "**Agent**" on Linux, access the Linux terminal after installation.

You can run the following commands:

* **global\_settings -view** : allows you to view the Agent's global settings, such as server status, integration status, etc.
* **global\_settings -concurrency\_limit (1..100)** : sets the number of parallel processes that the agent can handle in the range 1 to 100. The default value is 50.
* **global\_settings -allow\_unsafe\_ssl\_certificate true|false** : enable/disable checking the destination's SSL certificate before making a REST/SOAP call.

After making any changes, you will need to restart the "**Agent**" for the new settings to be applied.
{% endtab %}

{% tab title="Docker" %}
To configure the "**Agent**" in Docker, change the fields previously filled in during installation.

Where:

* `INTEGRA_ENV_USER=<email>`: The email used to log in to Skyone Studio.
* `INTEGRA_ENV_PASSWORD=<password>`: The password associated with your Skyone Studio account.
* `INTEGRA_ENV_ORGANIZATION_ID=<organization_id>`: Your Organization ID, available in the Docker Installation section of Skyone Studio.
* `INTEGRA_ENV_AGENT_NAME=<agent_name>`: The name assigned to the agent.
* `INTEGRA_ENV_AGENT_LOCATION=<agent_location>`: The location or environment where the agent is installed.
* `INTEGRA_ENV_CONCURRENCY_LIMIT=<concurrency_limit>`: Sets the number of parallel processes the agent can handle, ranging from 1 to 100. The default value is 50.
* `INTEGRA_ENV_ALLOW_UNSAFE_SSL_CERTIFICATES=<allow_unsafe_ssl_certificates>`: Enables or disables SSL certificate verification when making REST/SOAP calls.&#x20;
  {% endtab %}
  {% endtabs %}

### **Logs** <a href="#logs" id="logs"></a>

**Windows:**

There is a read-only Logs tab, which shows all the **Agent**'s logs. These logs will be updated as new events occur.

**Linux and Docker**

You can access the logs folder from the directory where the application is running.

Example: cat /logs/log20231206.txt

&#x20;

**Agent Registration: Possible Errors**

The following errors are possible in the return of the registration request:

| Error Message                     | Description / Action                                                                                                                                                                                                                                                                                                                                                                                                                                                                                                                                                                                                                                                                                                                                                                                                                    |
| --------------------------------- | --------------------------------------------------------------------------------------------------------------------------------------------------------------------------------------------------------------------------------------------------------------------------------------------------------------------------------------------------------------------------------------------------------------------------------------------------------------------------------------------------------------------------------------------------------------------------------------------------------------------------------------------------------------------------------------------------------------------------------------------------------------------------------------------------------------------------------------- |
| Agent already configured on host  | <p>The plataform has identified that there is an "<strong>Agent</strong>" previously configured on the workstation.</p><p>You can either abort the installation or, if you are so authorized, you can enter the plataform panel and delete the "<strong>Terminal"</strong> associated with the old "<strong>Agent</strong>". Doing that allows you to retry the operation.</p><p>If you do not have permission to delete the "<strong>Terminal"</strong>, you might be trying to install the "<strong>Agent</strong>" in the wrong <strong>workspace</strong>.</p><p><strong>Note</strong>: the same "<strong>Agent</strong>" can be used by several Integrations; therefore, there is no need for multiple installations.</p>                                                                                                          |
| Agent name already exists         | <p>The plataform has identified that there is already an "<strong>Agent</strong>"with the <strong>same name</strong> available in the <strong>workspace</strong>.</p><p>It is possible that this happened because you want to move the "<strong>Agent</strong>" from one workstation to another, without losing all the work already done in the Integrations that point to the <strong>Agent</strong> <strong>Terminal</strong>. In this case, you <strong>must</strong> install the <strong>Agent</strong> on the new station and use the <strong>same name</strong> to replace the previous one. Therefore, <strong>Skyone Data</strong> alerts you that the previous <strong>Agent</strong> with the same name will be deactivated and replaced by the new one and also asks for your confirmation to proceed with this change.</p> |
| Control channel is not configured | It only appears while the "**Agent**" is being configured, before its data is entered, and it means that the "**Agent**" has not yet been configured. There no action required.                                                                                                                                                                                                                                                                                                                                                                                                                                                                                                                                                                                                                                                         |


---

# Agent Instructions: Querying This Documentation

If you need additional information that is not directly available in this page, you can query the documentation dynamically by asking a question.

Perform an HTTP GET request on the current page URL with the `ask` query parameter:

```
GET https://docs.skyone.cloud/english/skyone-studio/terminals-and-agent/agent.md?ask=<question>
```

The question should be specific, self-contained, and written in natural language.
The response will contain a direct answer to the question and relevant excerpts and sources from the documentation.

Use this mechanism when the answer is not explicitly present in the current page, you need clarification or additional context, or you want to retrieve related documentation sections.
